Syllabus
Queens College
Art Department – Photography & Imaging
3D Modeling, Printing, & Casting I
PHOTO 230/ARTS 282-02, 369-01, 387-01, 6203-05, 7272-07
Tuesday 10:00am-1:50pm
I-Building Rm 212 & Klapper 181
Fall 2024
Instructor: Matt Greco
Office: Klapper 106
Hours: By Appt
Email: matthew.greco@qc.cuny.edu
Course Website: https://www.professorgreco.com
Course Description:
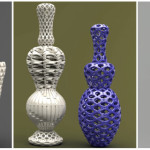
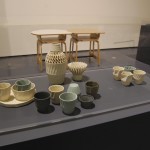
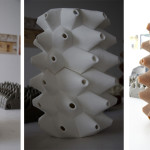
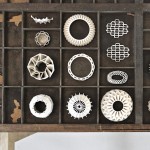
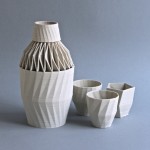
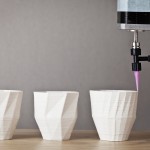
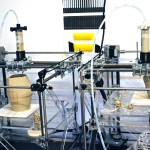
3D Modeling/Printing and Casting will emphasize the role new technologies play in imaging and analog sculptural processes. In this course students will learn how to take advantage of imaging technology such as 3D modeling and printing as it applies to the traditional ceramic practice of slip casting. The course will explore the rudiments of 3D modeling, how to prepare 3D files for 3D printing using Fused Deposition Modeling, the basics of molding models in plaster, the unique properties of ceramic slip, the process of producing multiples through slip casting, and glazing/firing the finished castings. Students will study the aesthetic qualities of translating 2D images into 3D sculptural form as well as the technical aspects of the process.
Course Objectives:
At the close of this course the successful student will have a comprehensive understanding of 3D modeling in solids, preparing files for 3D printing, and the process of slip casting. They will expand their vocabulary to include the proper terminology for creating and critiquing sculptural form as well as the major components of the technical process. They will demonstrate the ability to think creatively, form project ideas, and follow those ideas from conception to realization. Students will have a sound understanding of how new digital tools and technologies can advance traditional artistic practices.
Course Requirements:
Students will be expected to complete all assignments on time and to the best of their ability. Students are expected to attend every class but life does happen so you get 3 absences, after that, additional absences will likely result in missed material and thus a lower grade. Be on time please; tardiness is as bad as absences; I will begin class a few minutes late to give everyone time to get settled in – do not abuse this. We will have a final critique; attendance is required.
Reasonable Accommodations for Students with Disabilities:
Students with disabilities needing academic accommodation should register with the Special Services Office by emailing QC.SPSV@qc.cuny.edu. For more information about services available to Queens College students, visit the Office of Special Services website: https://www.qc.cuny.edu/sp.
CUNY Policy on Academic Integrity:
Only your own photos, images and/or writing are permitted for use in projects. The unauthorized use of images and compositions that are not your own is considered plagiarism. Academic Dishonesty is prohibited in The City University of New York and is punishable by penalties, including failing grades, suspension, and expulsion as provided at https://www.cuny.edu/about/administration/offices/legal-affairs/policies-procedures/academic-integrity-policy/.
Course Website:
Please check our course website every week for updates to the syllabus or schedule, links to information and resources, and a student gallery page where we will showcase your work throughout the semester.
Grades:
(2) 3D Models prepared correctly for 3D printing – 20%
(2) 3D Prints – 20%
(2) Plaster Molds – 20%
(8) Final Glazed Castings – 40%
Projects (one 3D model must be printed, molded and 8 final castings made):
- Cup
Must be modeled and saved for 3D printing. Object must show attention to form and use.
- Bowl
Must be modeled and saved for 3D printing. Object must show attention to form and use.
Printing:
You will be responsible for getting your 3D models printed:
You should send your files to a service bureau to be printed. I suggest Protolab Network by HUBS – they have a dollar minimum so submit your files in groups – https://www.hubs.com/. Check the parameters below and be sure you have your file printed correctly.
You can check out Queens College’s Makerspace: https://library.qc.cuny.edu/makerspace/ – Rosenthal Library Rm 101. It is possible to make 3D prints here. You need to schedule an orientation and safety training before you can use the space. Do this right away so you have access when you need to make your prints. Using the makerspace is free but you’ll only get limited support and training.
Or you can print yourself at home if you have your own 3D printer.
Do not send your file to print until approved by me.
Printing Parameters:
Max Height: 130mm
Max Width: 125mm
Process: FDM
Material: PLA
Infill: 10%-20%
Equipment:
Check all equipment to ensure good operation, especially jump drives and portable hard drives. Lost files, corrupted disks, etc. are not acceptable excuses for missed assignments. BACK UP EVERYTHING OFTEN.
Required:
- 128GB flash drive
Like This: CLICK
- 1 five gallon bucket
Like this: CLICK
- 2 four quart round or square plastic container
Like this: CLICK
Recommended Reading:
- The Book on 3D Printing by Isaac Budmen & Anthony Rotolo
- Fabricated: The New World of 3D Printing by Hod Lipson & Melba Kurman
- The Essential Guide to Mold Making & Slip Casting by Andrew J. Martin
Schedule (subject to change):
Week 1: 9.3
I-212
Course outline, review syllabus, required equipment, recommended reading.
Week 2: 9.10
I-212
What is 3D printing? History of 3D printing, various 3D printing technologies, 3D modeling software, modeling in solids vs meshes, making a printable 3D model
Week 3: 9.17
I-212
3D modeling with Autodesk Fusion 360
3D modeling a house, modeling a gear
Watch LinkedIn Learning Videos
Bring sketches of cup for class on 9.19
Week 4: 9.24
I-212
3D modeling with Autodesk Fusion 360 cont.
3D modeling a house, modeling a gear cont.
3D model cup & bowl #1
Week 5: 10.1
I-212
3D modeling with Autodesk Fusion 360 review
Workday
3D model cup & bowl #2
Week 6: 10.8
I-212
3D modeling with Autodesk Fusion 360 review
Workday
3D model cup & bowl #3
Week 7: 10.15
NO CLASS – TUES is a MON
Week 8: 10.22
I-212 & KP 181
Intro to making plaster molds; poured & frosted molds, cottle boards
Making plaster molds for slip casting
Ceramic 101 – green ware, bisque ware, glaze ware – cone temps and glazing techniques
What is slip and how do you cast with it?
Workday
DROP DEADLINE – Final models saved as STL and sent to be 3D printed
Week 9: 10.29
KP 181
Mold making demo
Making molds
MUST HAVE both 3D prints
Week 10: 11.5
KP 181
Casting demo
Workday
Making molds
Week 11: 11.12
KP 181
Glazing 101 Demo
Workday
Making castings
Week 12: 11.19
KP 181
Workday
All castings should be dry and on shelves for firing
Week 13: 11.26
KP 181
Workday
Glazing
Last Wet Day (all castings should be drying in preparation for firing)
Week 14: 12.3
I-212 & KP 181
Workday
Week 15: 12.10
I-212 & KP 181
Workday
Last Glaze Day and final firing of castings
Week 16: 12.17
KP 181
LAST DAY OF CLASS
Final Critique: show (2) 3D prints and 8 final castings.
Document work, clean up studio
_____________________________________________________________________________________
Resources
Equipment Recommendations:
4 QT Round or Square Plastic Container
Book Recommendations:
The Essential Guide to Mold Making & Slip Casting by Andrew J. Martin
The Book on 3D Printing by Isaac Budmen & Anthony Rotolo
Fabricated: The New World of 3D Printing by Hod Lipson & Melba Kurman
Software:
Autodesk Fusion 360 (click here and register for a student account – use your QC email address – when asked, create “new team” and name it your name)
Linkedin Learning (free for CUNY students):
Linkedin Learning for Queens College
Fusion 360 on Linkedin Learning
Fusion 360 Navigation & Keyboard Shortcuts
- Zoom: roll the middle mouse button or Ctrl + Shift + middle mouse button
- Pan: middle mouse button
- Orbit: Shift + middle mouse button
| Mouse/Touchpad: | ||
| Pan | press middle button | press middle button two-finger drag |
| Zoom | roll wheel | roll wheel pinch |
| Orbit | Shift + press middle button | Shift + press middle button Shift + two-finger drag |
| Orbit around point | Shift + click then press middle button | Shift + click then press middle button |
Printing:
You will be responsible for getting your 3D models printed:
You should send your files to a service bureau to be printed. I suggest Protolab Network by HUBS – they have a dollar minimum so submit your files in groups – https://www.hubs.com/. Check the parameters below and be sure you have your file printed correctly.
You can check out Queens College’s Makerspace: https://library.qc.cuny.edu/makerspace/ – Rosenthal Library Rm 101. It is possible to make 3D prints here. You need to schedule an orientation and safety training before you can use the space. Do this right away so you have access when you need to make your prints. Using the makerspace is free but you’ll only get limited support and training.
Or you can print yourself at home if you have your own 3D printer.
Do not send your file to print until approved by me.
Printing Parameters:
Max Height: 130mm
Max Width: 125mm
Process: FDM
Material: PLA
Infill: 20%
Orientation: print upside down
Online Open Source 3D Models:
Metrics
100 microns (μ) = .1 mm
1000μ = 1mm
To Find Cubic Inch Volume:
height x width x depth = cubic inches
To Find Volume of Plaster for Cubic Volume:
cubic inches ÷ 58 = quarts
quarts – 20% (multiply by .20) = volume of H20 needed
refer to chart below
Plaster Mixing Chart
| Water | Plaster | |||
| 1 quart | 2 lbs. 14 oz. (1,293 grams) | |||
| 1 1/2 quarts | 4 lbs. 4 oz. (1,937 grams) | |||
| 2 quarts | 5 lbs. 11 oz. (2,585 grams) | |||
| 2 1/2 quarts | 7 lbs. 2 oz. (3,230 grams) | |||
| 3 quarts | 8 lbs. 9 oz. (3,878 grams) | |||
| 3 1/2 quarts | 10 lbs. (4,522 grams) | |||
| 1 gallon | 11 lbs. 6 oz. (5,171 grams) | |||
| 1 1/2 gallons | 17 lbs. 2 oz. (7,756 grams) | |||
| 2 gallons | 22 lbs. 13 oz. (10,337 grams) | |||
| 2 1/2 gallons | 28 lbs. 8 oz. (12,923 grams) | |||
| 3 gallons | 34 lbs. 3 oz. (15,508 grams) |
Mixing Plaster for Slip Casting Molds PDF
Sin-Ying Porcelain Casting Slip Recipe ^10
________________________________
Video Tutorials
Part 1:
Autodesk Fusion 360 Tutorials:
Part 2:
Linkedin Learning Fusion 360 Tutorials:
Fusion 360 Essential Training
Watch Chapter 2 parts 1 – 10 (stop at “What is Lofting?”)
Watch Chapter 3 parts 4 and 5 “Overview of TImeline” and “Editing via the Timeline”
Part 3:
Extrude & Taper in Fusion 360
;
Circular Pattern Sketch in Fusion 360
Revolve in Fusion 360
Lofting in Fusion 360
Export to STL in Fusion 360
Modeling with T-Splines (Forms) in Fusion 360
Move, Copy, Paste – Sketches and Bodies
Creating a one-part plaster mold:
How to use Solidworks to design a multi-part mold:
You can use similar techniques and tools to do this in Fusion 360
_________________________________________________________________________________________
Videos
Just Plain Cool
3D Printing Videos
3D Slicing Video
Mold Making Videos
Casting Videos
_______________________________________________
Work by Ceramic Artists Using 3D Printing
___________________________________________________________________________________
Lectures
Lessons
